Configuring the Server using Composer
1. Choose the “Organization" tab then Click on the "Generate" button followed by clicking the "Next" button.
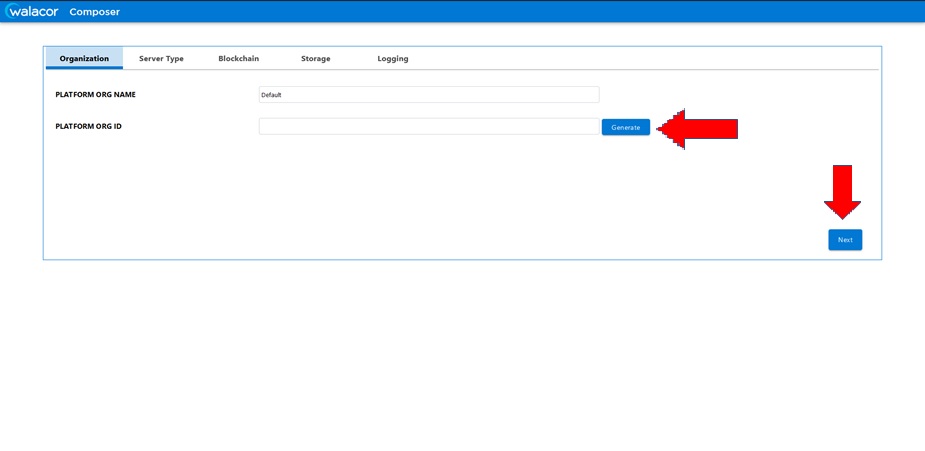
Figure : Composer Landing Page
2. Choose the “Server Type" tab:
Case1: On Selecting “master” from the dropdown:
a. Select the “words" dropdown list for "Encryption ND Seed" and choose one of the values ("12 or 24")
b. Click “Generate"
c. Click “Next"
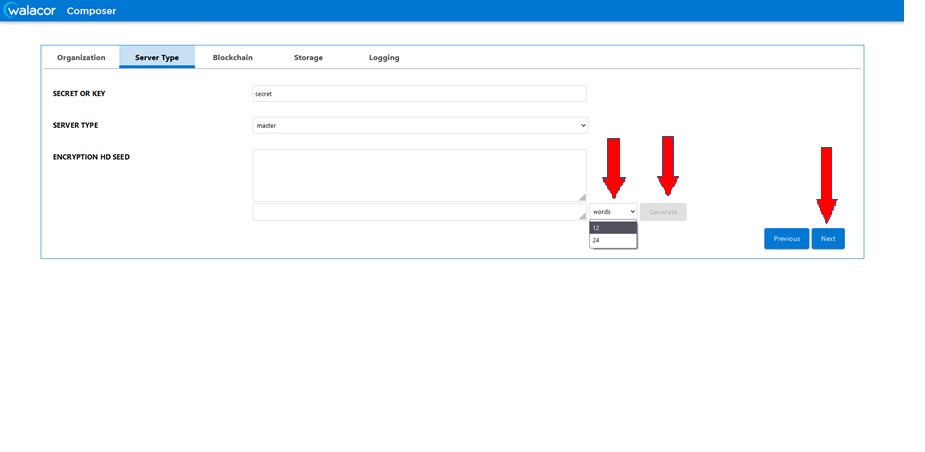
Figure : Server Type Page

Figure : Key Generation
Case2 : On Selecting “replica” from the dropdown:
a. Authentication is the initial stage in the creation of a Replica. Replica is selected from the dropdown menu, displaying the screen below where the mandatory fields' values must be input. The screenshot highlights the sample values.
b. After entering the required values, click on the “SIGN IN" button.
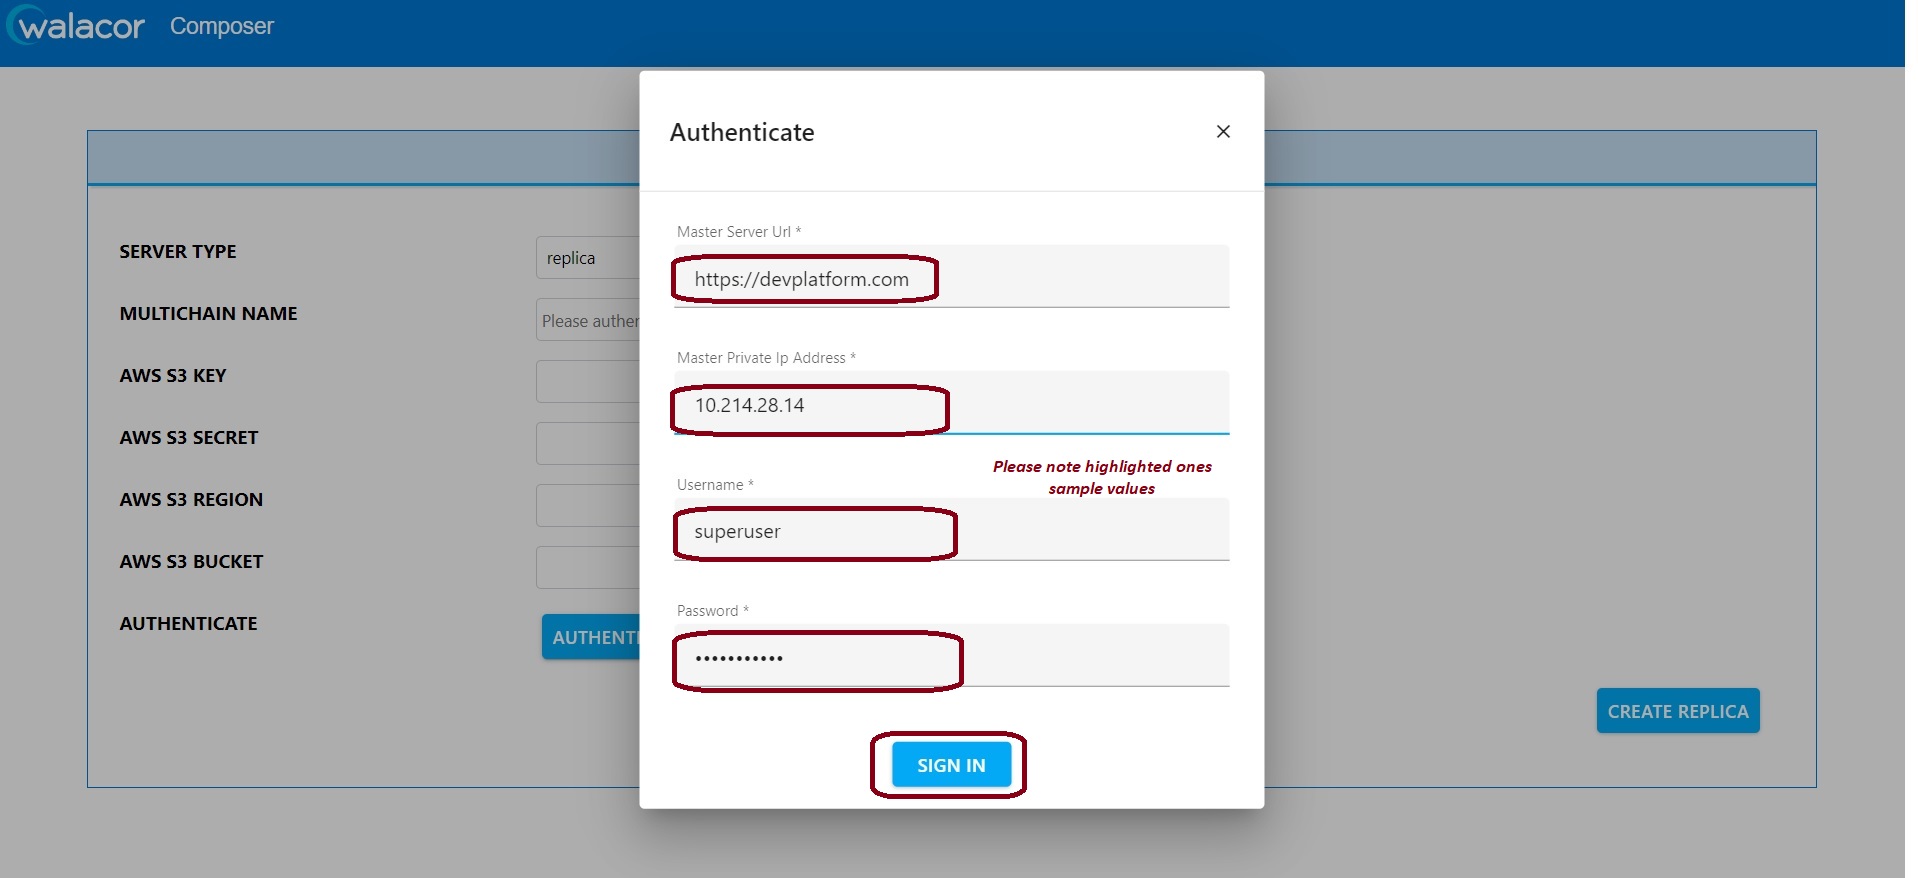
Figure : Authentication
c. Next step is to create a Replica. A new window will appear after clicking the “SIGN IN" button, asking for information pertaining to Amazon S3, such as the Key, Secret, Region, and Bucket. Typical values are displayed in the screenshot. Once the necessary details are filled out, click the “CREATE REPLICA" button.
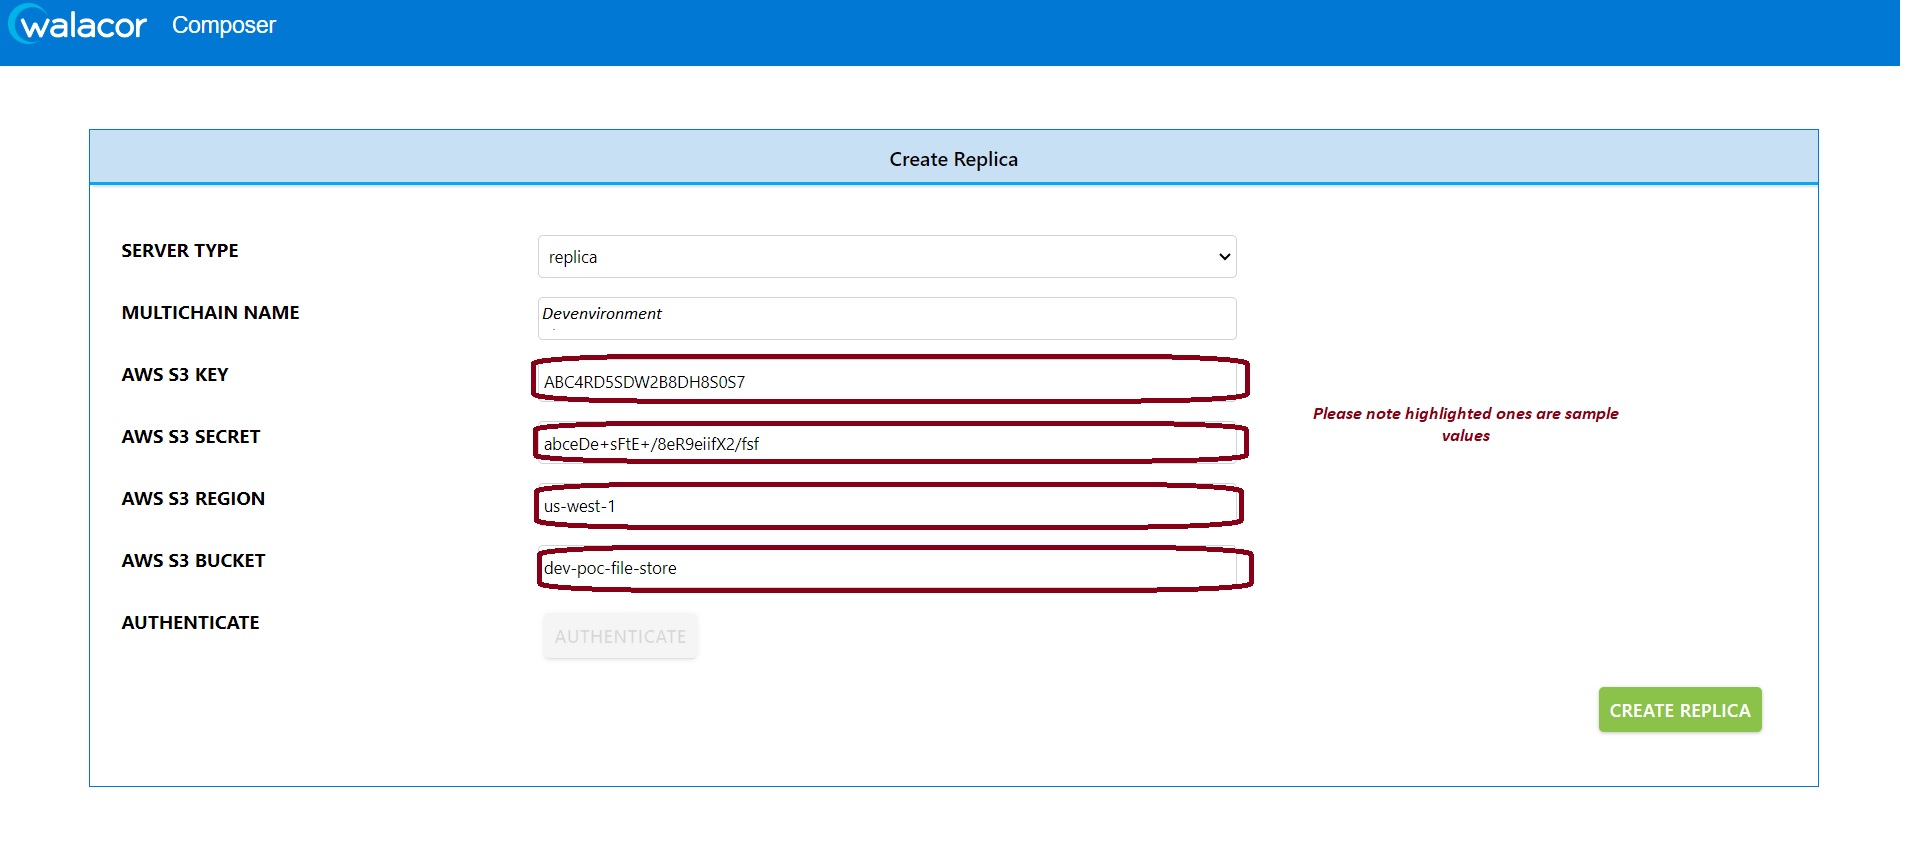
Figure : Create Replica
d. The initialization of services after clicking the “CREATE REPLICA" button may take a few minutes, and the counter is also displayed like below.

Figure : Initialization
e. Once the services are initialized, a success message is displayed.

Figure : Initialized
3. Choose “Blockchain" tab: Enter a value for "Chain Name" (Enter any text for this value). Click "Next"

Figure : Blockchain Page
4. Choose “Storage" tab. Based on the preference (Local Storage or AWS S3 Storage), select disk storage:
4a) To use Local Disk Storage: Select "Yes". Click "Next"

Figure : Local Storage
4b) To use AWS S3 Storage: Select "No". Fill in values with the proper values. Click "Next"

Figure : Storage Page
5. Choose the “Logging" tab: Use default settings and click "Save And Exit"
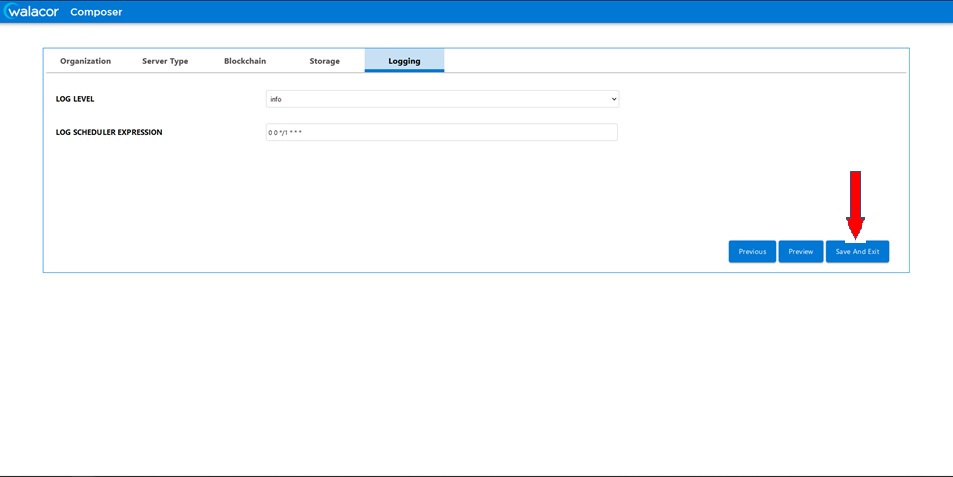
Figure : Logging Page
6. Server will restart to load the new environment variables from Composer. Refresh the browser page after 2 minutes
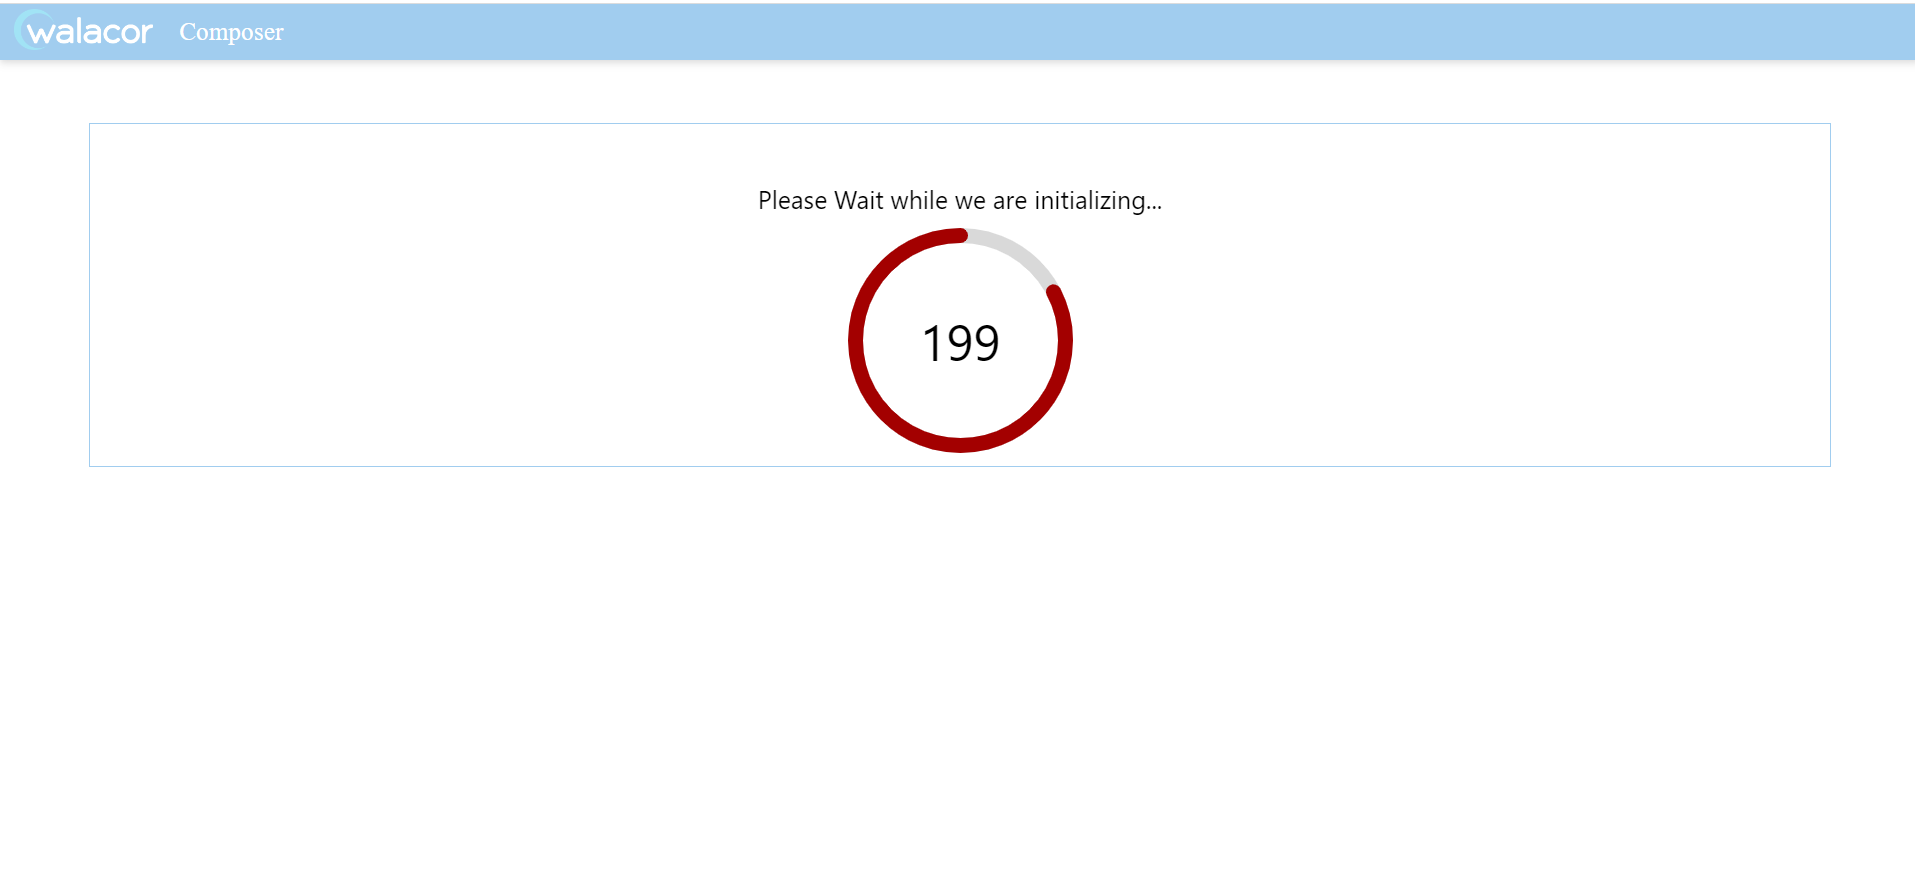
Figure : Loading Screen
7. Go to AWS EC2 Instance screen: Select the image in the Instance window. Highlight and copy the Instance ID. This is the new password to log into the new server.
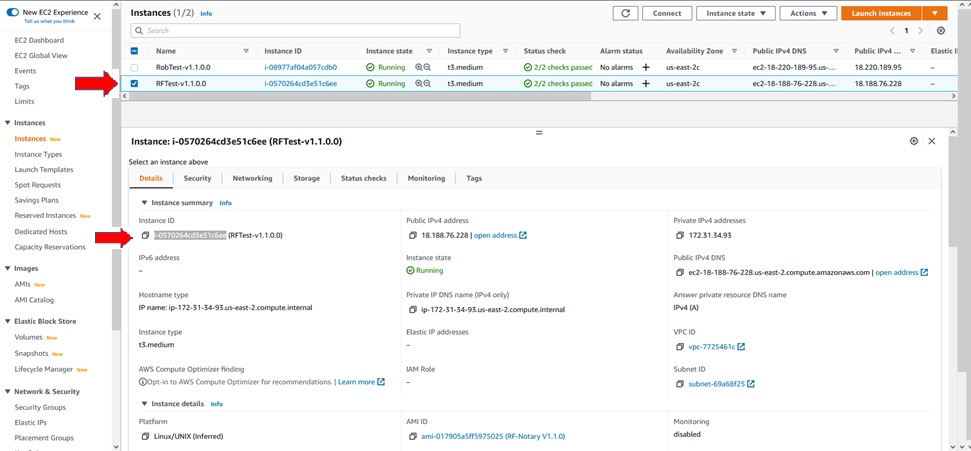
Figure : AWS EC2 Instance Screen
8. Go to the browser and log into the new server:
a. Username = Admin
b. Password = (Instance ID)
c. Click “Submit"
d. Screen will prompt to change the password.
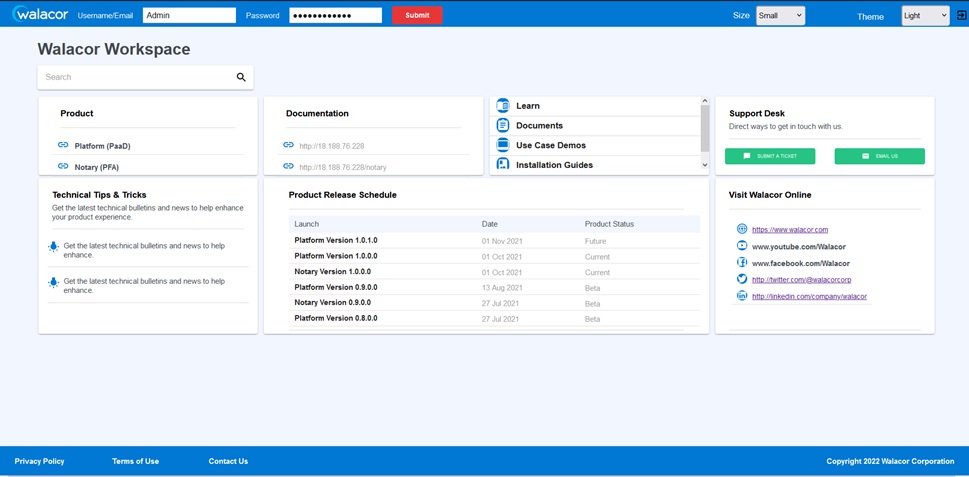
Figure : Walacor Login Screen
9. Please Sign-in and Test.
