Azure - Server Instance Installation
Sign in to Azure
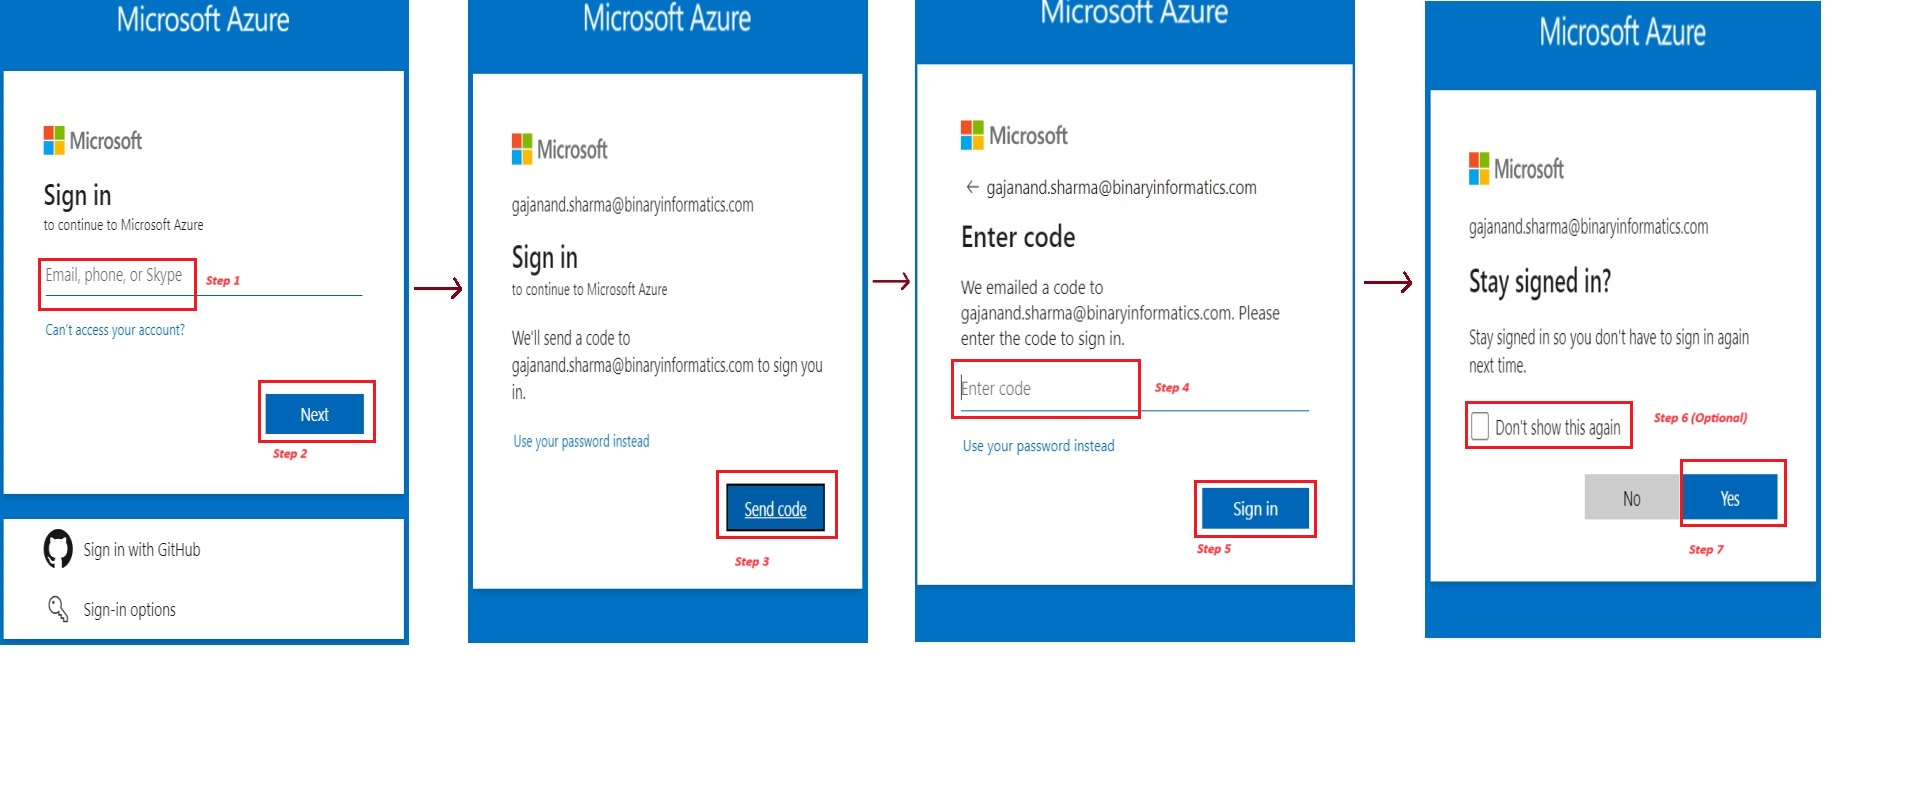
Sign in to the Azure portal at https://portal.azure.com
Enter the email address = ****@yourdomainname.com and click "Next"
Azure will ask to transmit a code to the email address in order to validate the user. Select ”Send Code”. The choice to "Use your password instead" is available otherwise. Here, the ”Send Code” Option is used to demonstrate signing in.
Verify the email code received to log in. After entering the code, select ”Sign In”.
On the ”Stay Signed In” screen, click “Yes” if the user wants to stay signed in and not sign in again the next time. The user can also check the box to indicate that they do not want to see this screen again. This will navigate to the landing page.
Create virtual machine
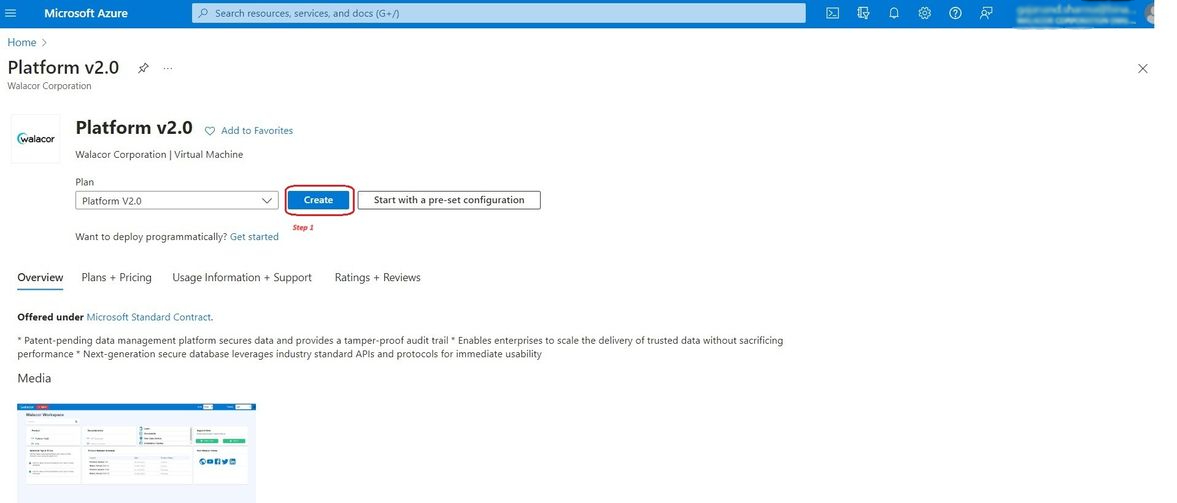
Enter ”platform v2.0” in the search. In the dropdown under the Marketplace user will see ”Platform v2.0”. Select the same.
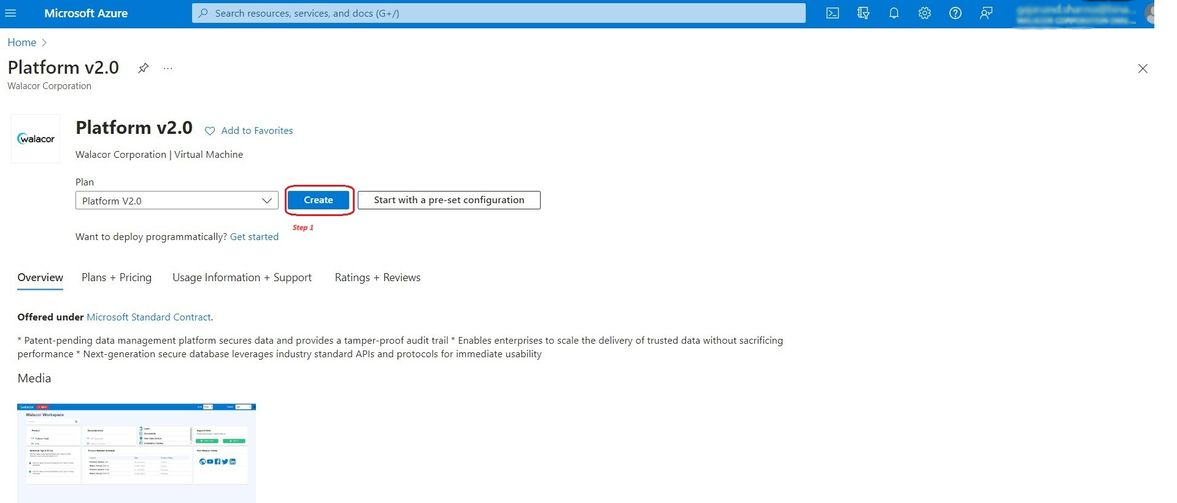
Click on “Create” to proceed with the creation of Virtual Machine. The ”Create a virtual machine” page opens.
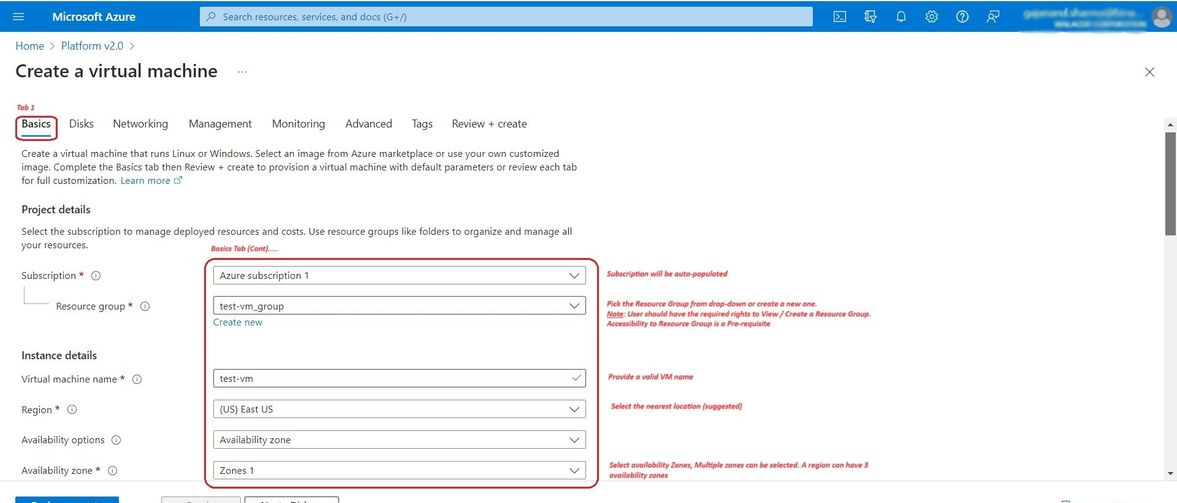
Configuration: In the ”Create a virtual machine” panel, user can get distinct tabs like Basics, Disks, Networking, Advanced, Tags, and Review + create.
Tab 1: Basics :: Enter all the project details with information about the subscription, resource group, virtual machine name, region, availability options, and availability zone. Note: It is necessary to have the subscription and resource groups ready before proceeding with the creation of the virtual machine.
Carefully select the size of the virtual machine to be deployed. Here you will find different virtual machine size options in accordance with your basic configuration.
.jpg?inst-v=0162b960-ddc0-46f3-a3b8-ff2af7712843)
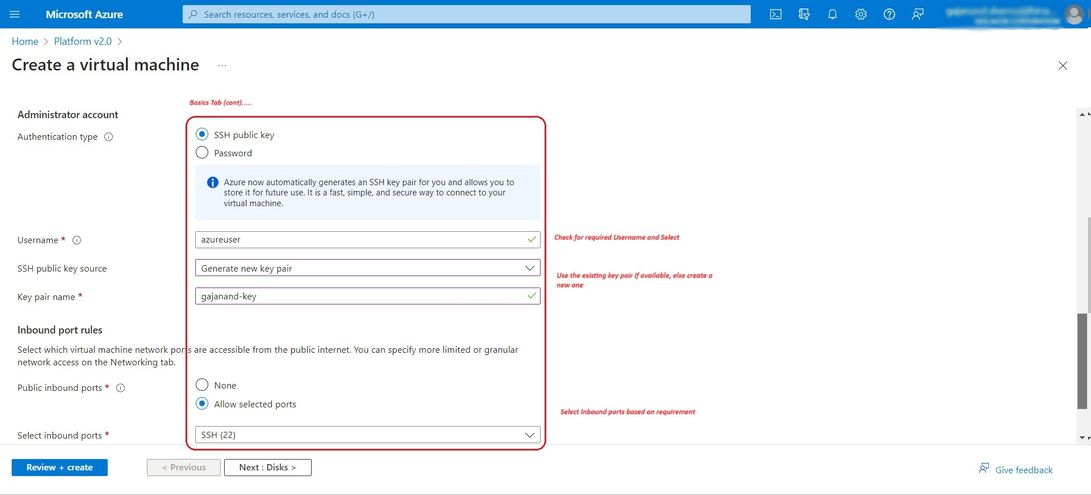
Fill in your username under the Administrator account. In the Inbound port rules section, choose to Allow selected ports and then choose SSH (22) from the drop-down menu.
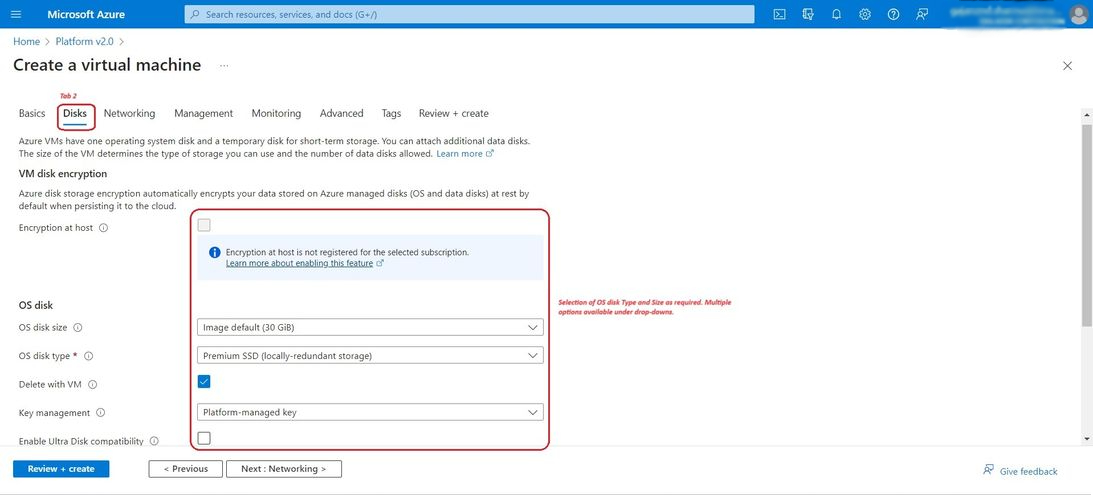
Tab 2: Disks :: Keep the defaults. For OS disk type, select Premium SSD as shown in the image if not shown in defaults.
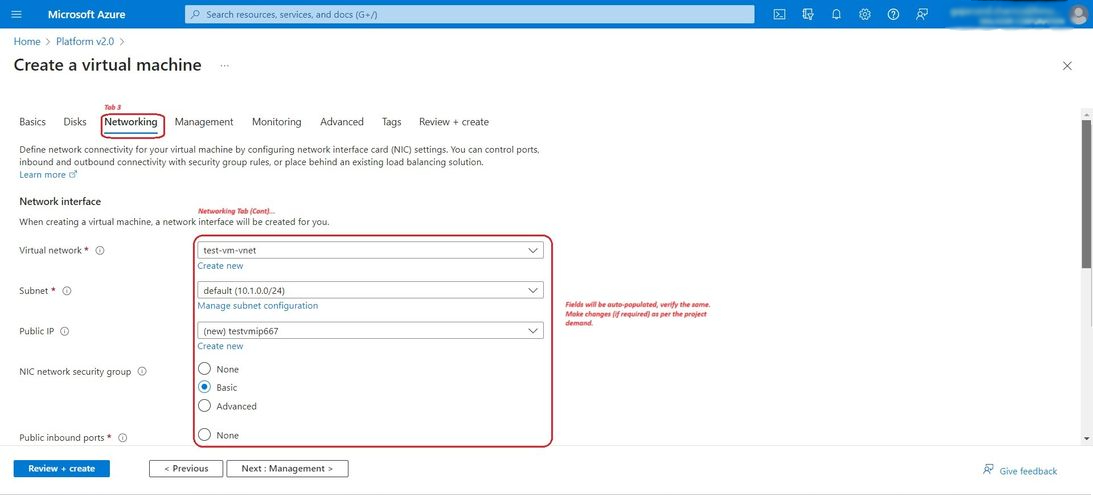
Tab 3: Networking :: In the ‘Networking’ section, user can choose the ‘Virtual Network’ type, ‘Subnet’, ‘Public IP Address’, and ‘Network Security Group.’ In the ‘virtual network’ section, user can either use an existing VNET or create a new one. After this, select the subnet for the Azure Virtual Machine. The subnet refers to a range of IP addresses from the VNET. While choosing the ‘Public IP Address’, user can again create a new public IP address or choose to obtain a publicly accessible IP address for this virtual machine.
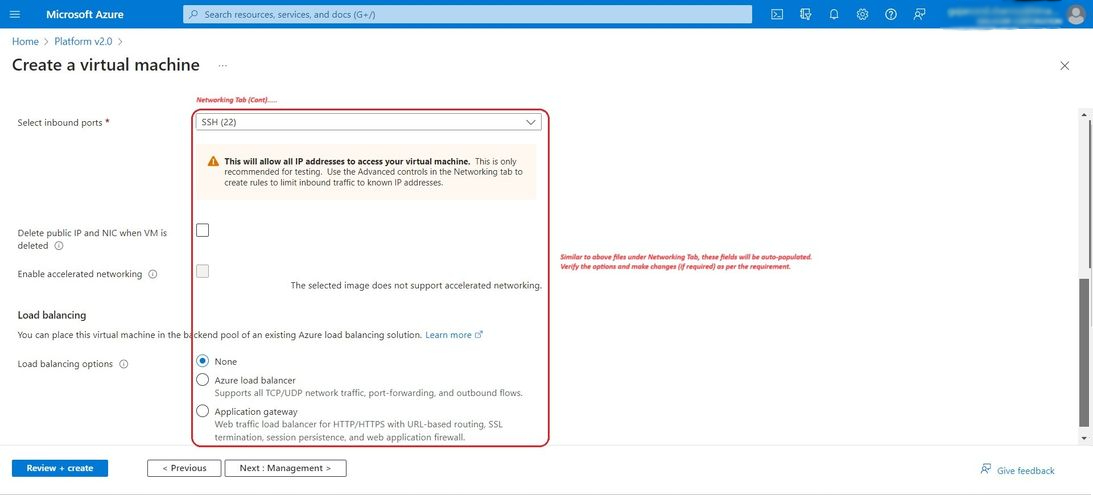
Do not forget to select the ‘Networking Security Group’ option. From here, user can configure the firewall rules (inbound and outbound) to control the traffic. Note that the default Network Security Group for Linux is SSH and Remote Desktop Protocol (RDP) in Windows.
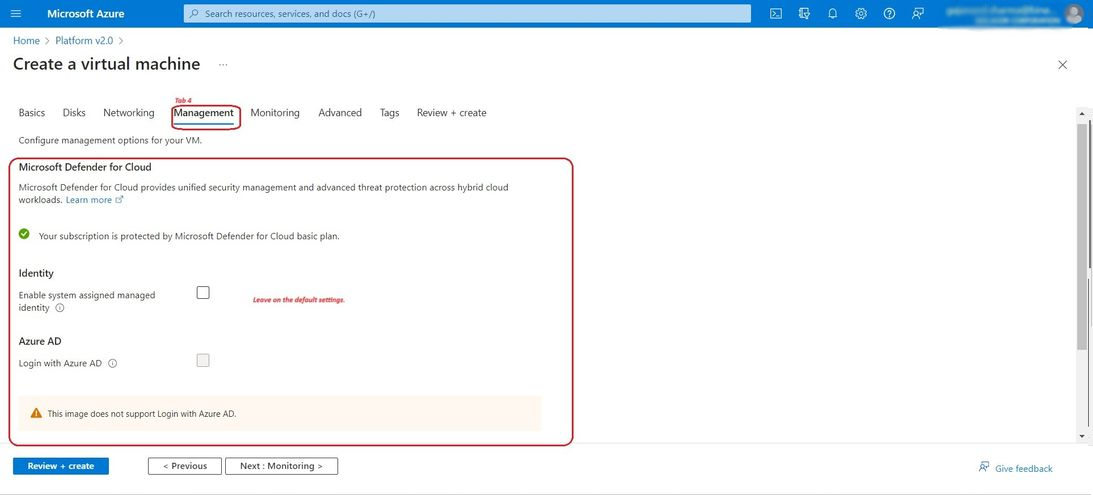
Tab 4: Management :: Leave on the default settings.
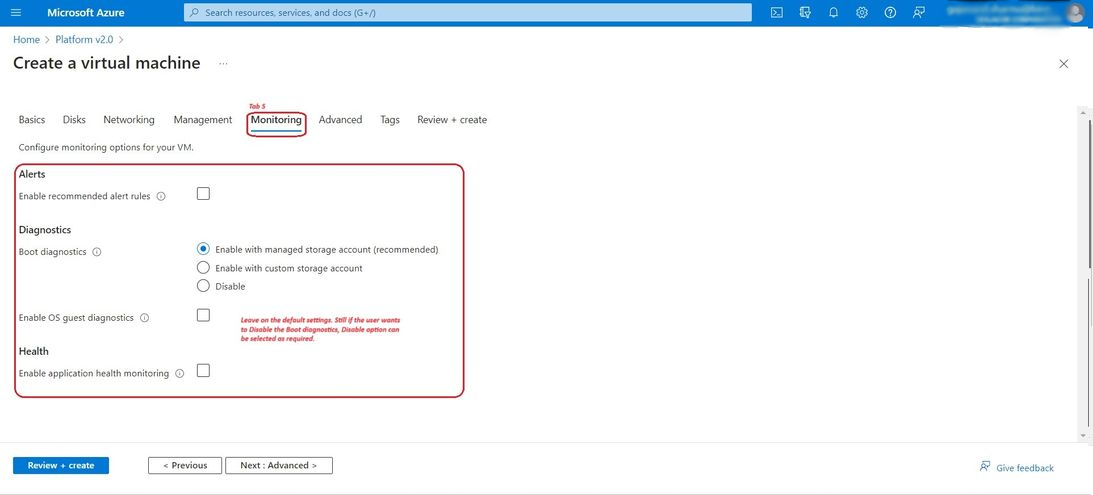
Tab 5: Monitoring :: Leave on the default settings.
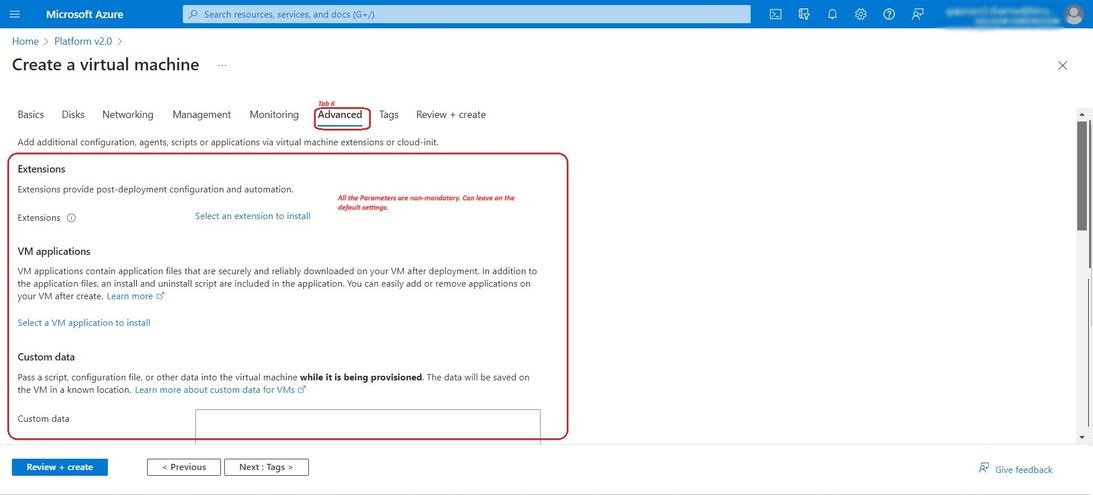
Tab 6: Advanced :: Leave on the default settings.
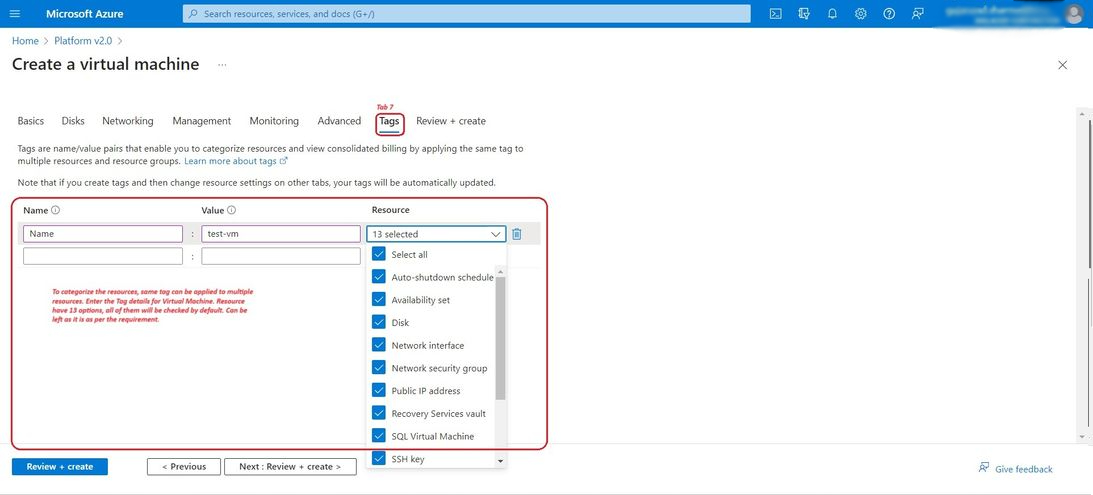
Tab 7: Tags :: Leave on the default settings.
Tab 8: Review + create :: Finally, select the Review + create button at the bottom of the webpage. Here user can get a basic impression of the virtual machine that the user is going to create. Further details of licensing are also highlighted in this section.
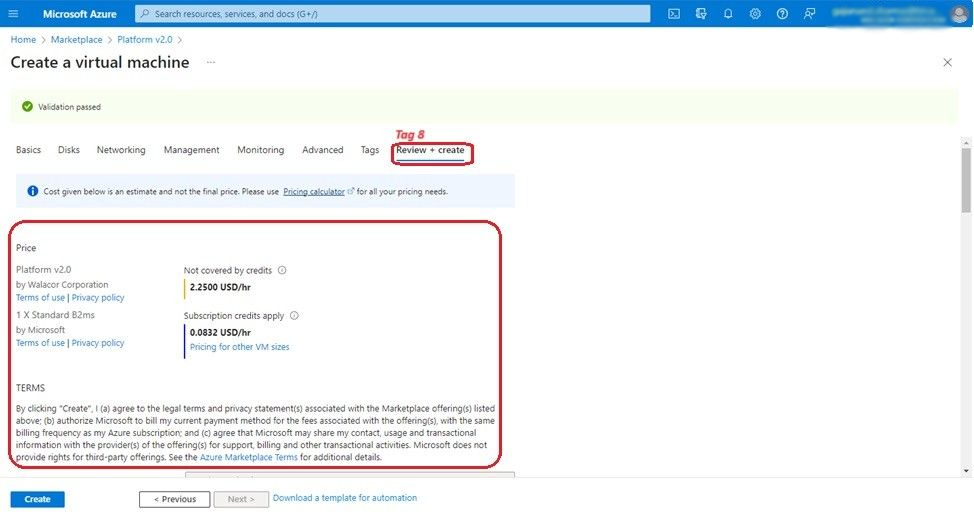
After the validation process is completed, the Create button at the bottom of the page will become active. Accept the Terms and Conditions if user is certain that he want to create his Azure Virtual Machine. Select the "Create" button.
When the deployment is finished, the user can go to the resources. The process of building an Azure Virtual Machine will take several minutes, so be patient during the process and the virtual machine will be fully provisioned and ready to use.
Allow Port 80 in VM / Check Public IP to Set the Composer
To set up the composer, the user must allow port 80 on the newly created virtual machine. Go to Virtual Machines → test-vm → Network settings → Create port rule → Inbound port rule.
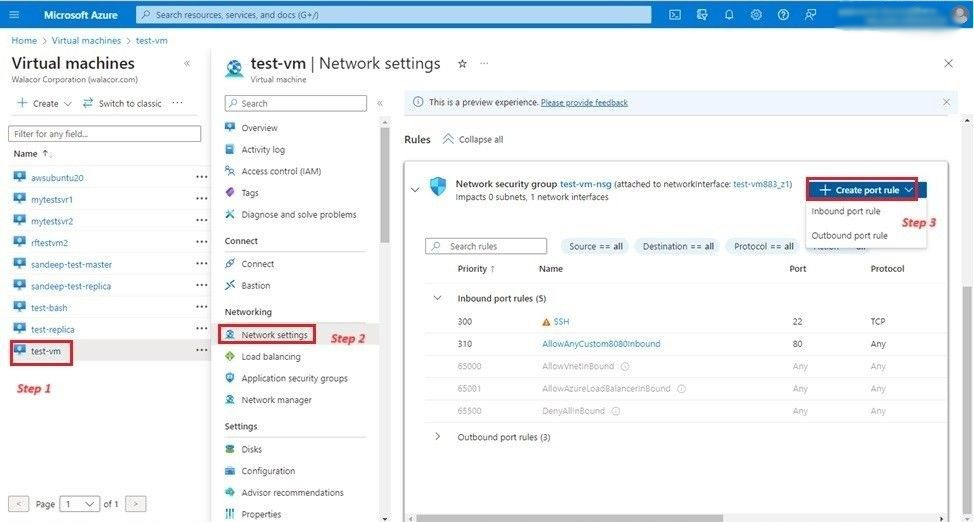
Pass / Select the details as shown in the image below.
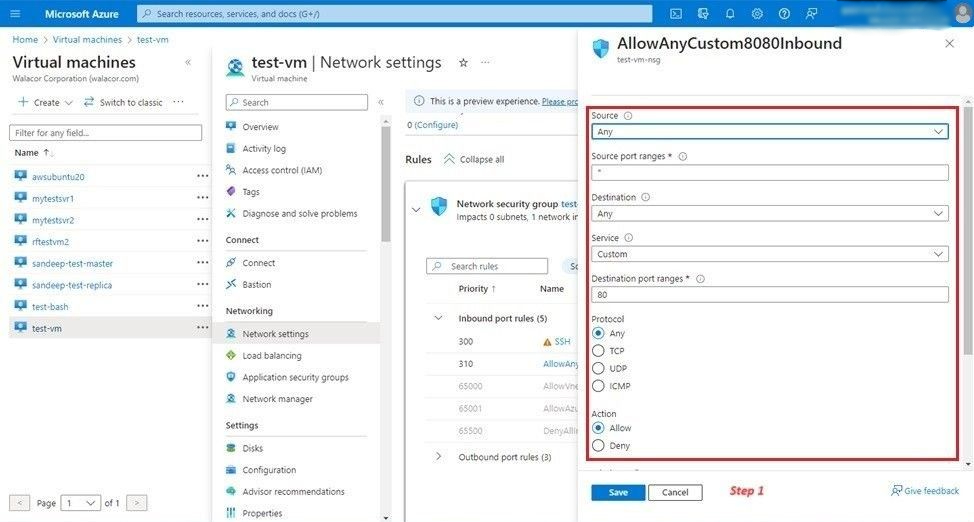
Complete the details. Click on “SAVE” button.
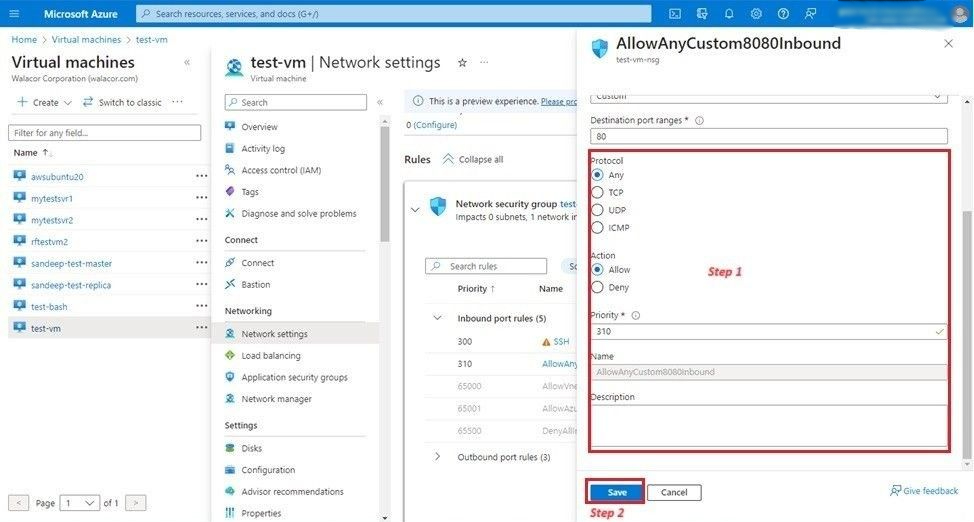
Now,
Once the instance is up and running, user can see its status.
Note that the instance has received a IPv4 Public IP.
Copy the Public IPv4 address.
Paste that IPv4 address into a new browser window and hit enter.
One should get the Composer Settings Page to finish completing the setup of the server environment. Link to get the Composer settings page: Configuring the Server using Composer
